Staff Training
The Staff training module helps to organize the staff training event and staff training application. The following tutorial will be labeled with Admin role, can be the management such as HR), Finance role, can be the management such as Finance Department), and
- Training Event
- Apply To Attend A Training
- Response To A Training Application
- Training Report
- Add A Payment Record
Traning Event Admin
The first thing in Staff Training is to add in a Training Event. The staff can only apply to attend the Staff Training after the event has been added.
Add Event
Step 1
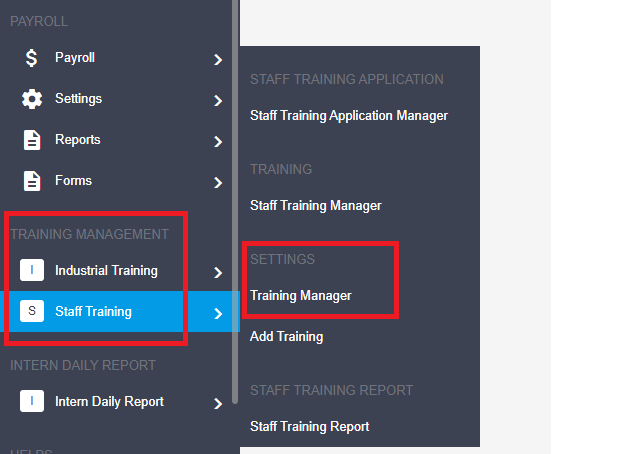
To add a Training Event, go to the (Training Management) Staff Training > (Settings) Training Manager.
Step 2
This is the Manager for the Training Event. Click on the Add Training button on the top right corner.

Step 3
Fill in the required information and clikc the Save button.
{primary} You can also add an event by clicking the Add Training from the sidebar menu.
Edit Event And Delete Event
Once the training event has been added, you can edit or delete the event by clicking the related icon.
For edit event, click the Save button.
For delete event, click the
Did you ever notice the View Trash button that is next to the Refresh button? If you want to restore or permanent delete the deleted event, click on the View Trash button.

You will see two buttons in the View Trash view. Table below listed their related function.
| Icon Button | Function |
|---|---|
| Restore the data | |
| Permanent delete the data |
Search Or Filter Event
You can search or filter the added event(s) by using the Search function or Filter function. Let's see how it works.

To search, enter the search term in the Search Bar on the top of the Manager, the result will be displayed.
To filter the data, use the dropdown on the right side of the Manager. You can filter the data by choosing the Month and Year.

Apply To Attend A Training Staff
Follow the steps below to apply to attend a training event.
Step 1
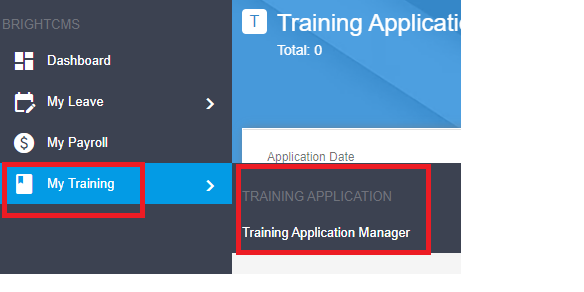
Go to Add Training from My Training (BrightCMS) My Training > (Training Applictaion) Training Application Manager.
Step 2
Click the Add Application on the right top corner.

Step 3
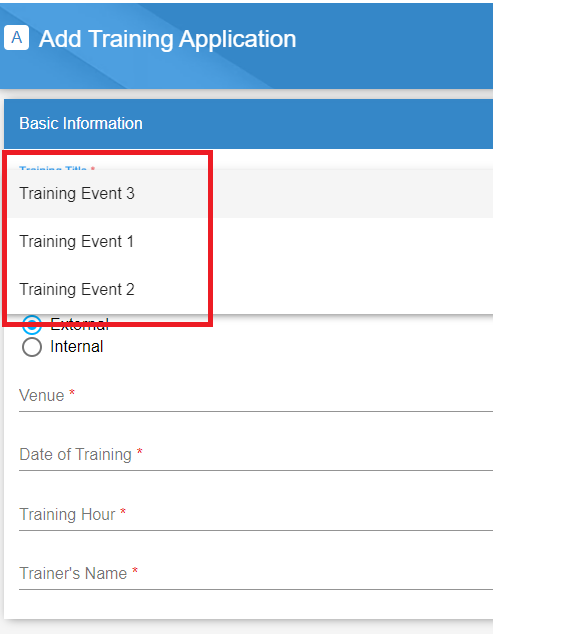
Choose an event from the dropdown for Training Title and click the Save button on the top right corner.
{warning} Other fields in the form will be auto-filled in. Do not change the information.
Congratulation! You have applied to attend a training event.

View Application
To view the details of your application, choose the application and click the
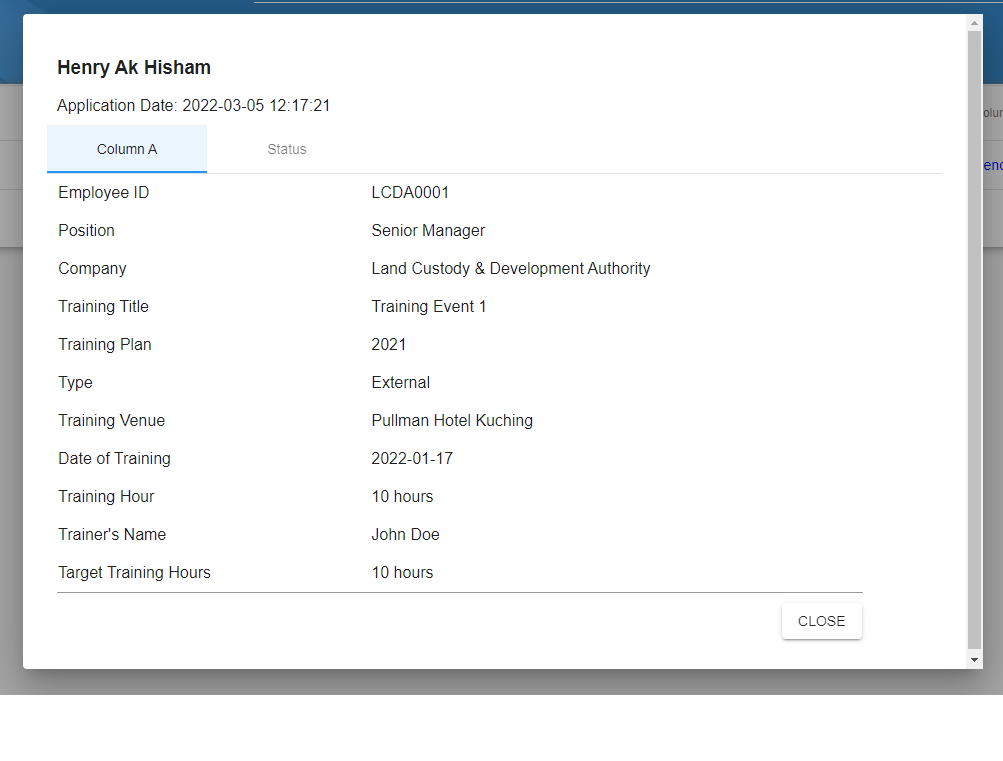
Check on your application's status.

The red rectangular represents the pending approval application, the green rectangular represents the approved application.
Search Application
If you want to search your application, enter the search term (training event) in the search bar to search.

Response To A Training Application Admin
Step 1
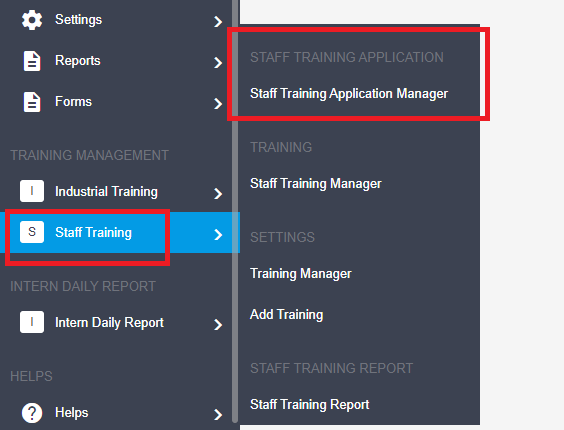
To view all training applications, log in to your account and go to Staff Training Application Manager as shown below.
Step 2
 Select an application and click the
Step 3
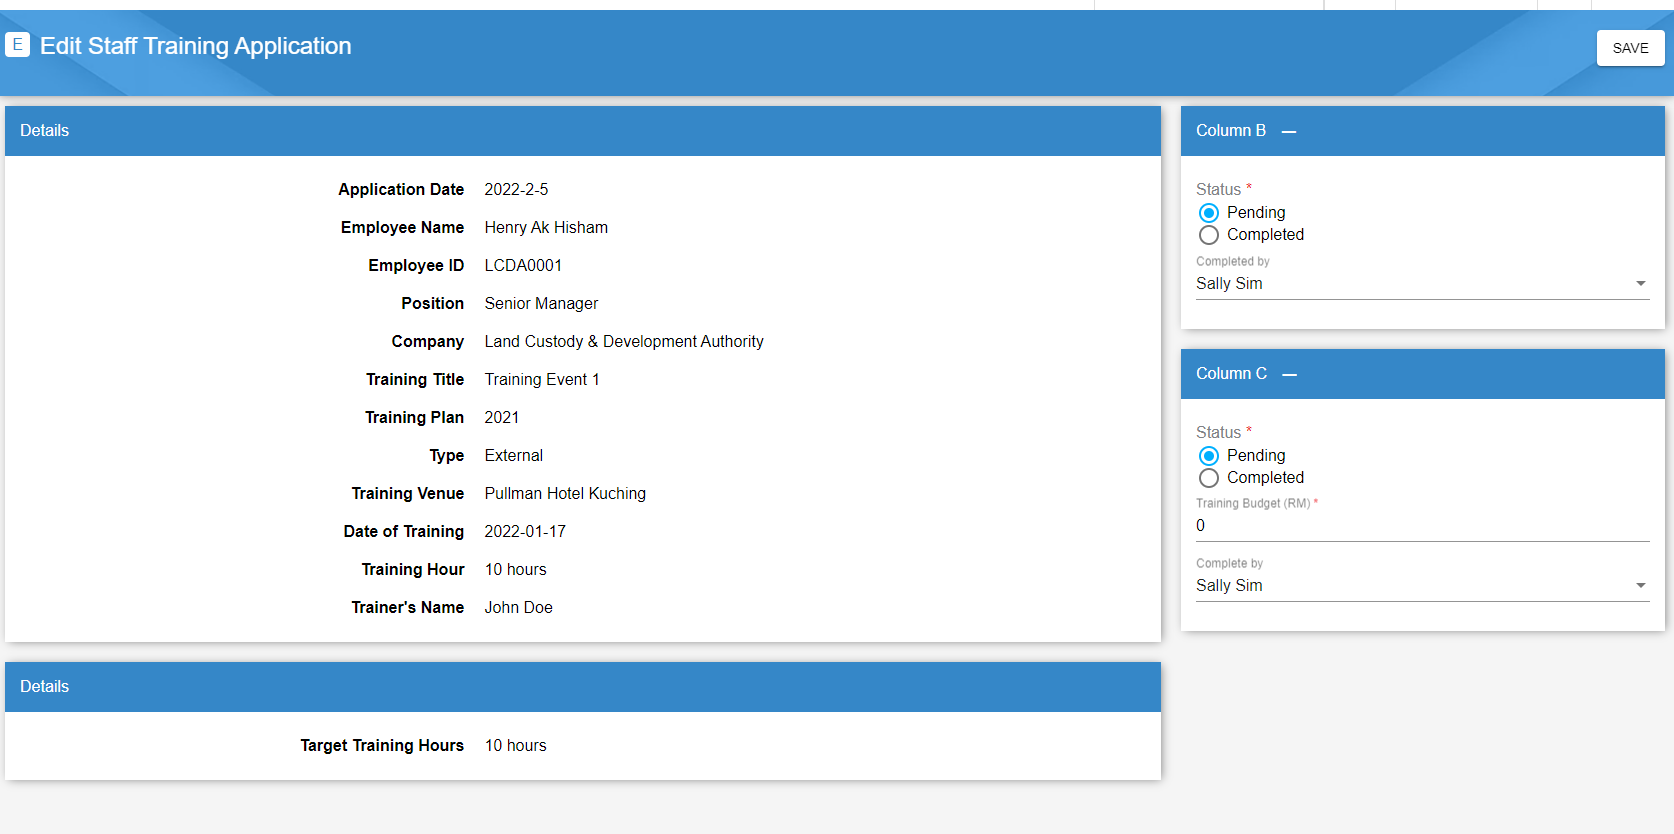
All the details regarding the training and training application are displayed on the left side Details cards. On the right side, there are Column B and Column C cards, this is where you will give the response to the application.
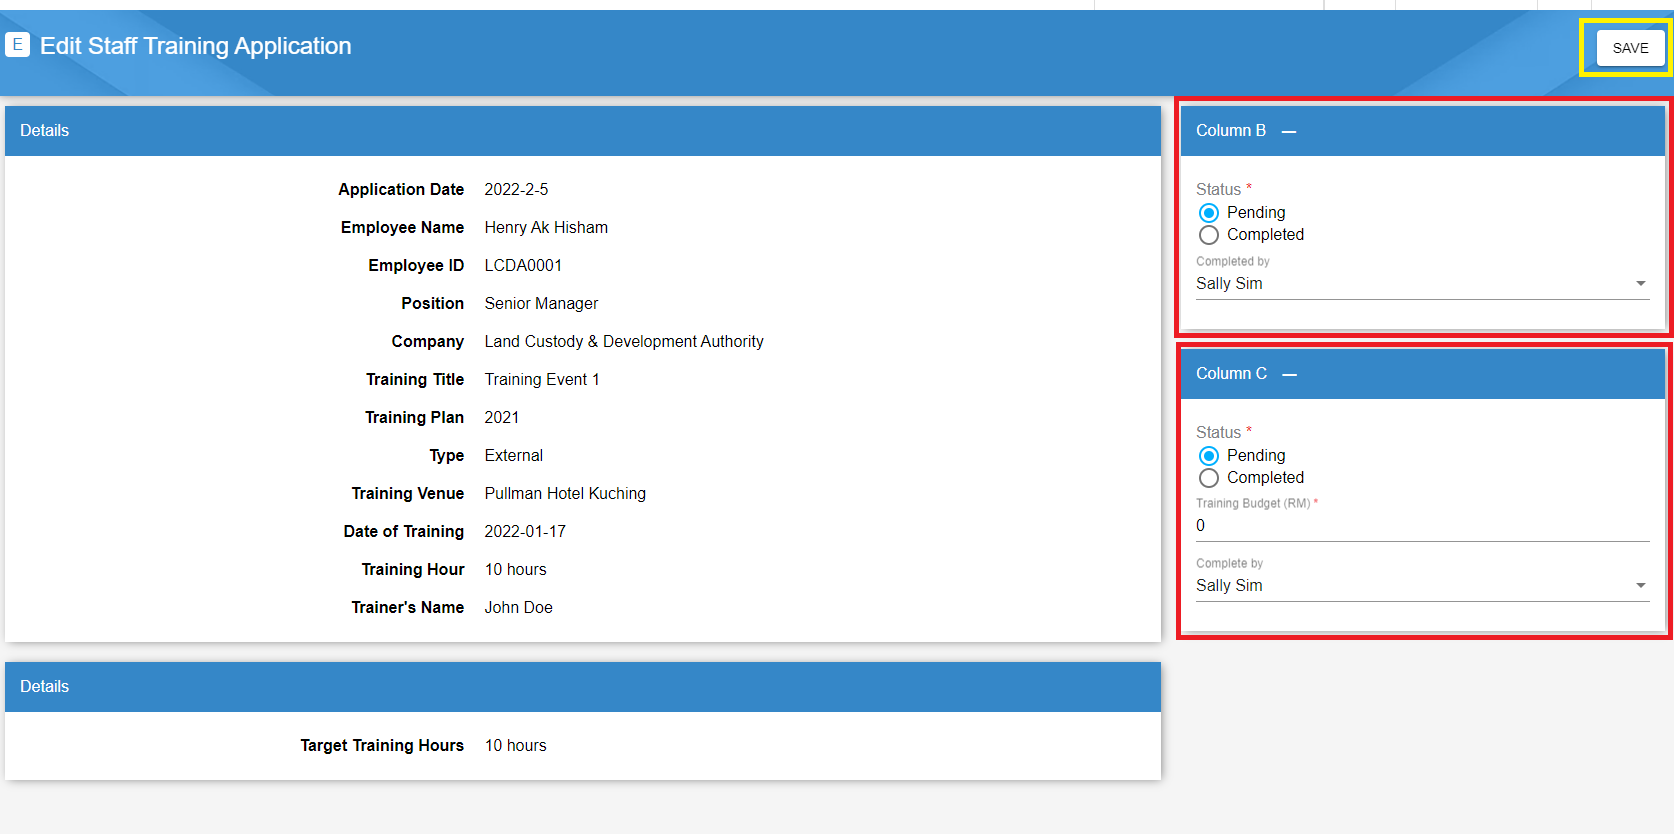
Click the Save button once you have done.
Step 4
Now check again on the application that you have response to. The status for Column B and Column C was changed but the Application Status is still Pending. Besides that, the

Step 5
The design for response to the application status is similar to the response to Column B and Column C. Check on the image below, on the left side is the training and application information, and on the right side is the response information. Give the response and click the Save button to keep your response data.
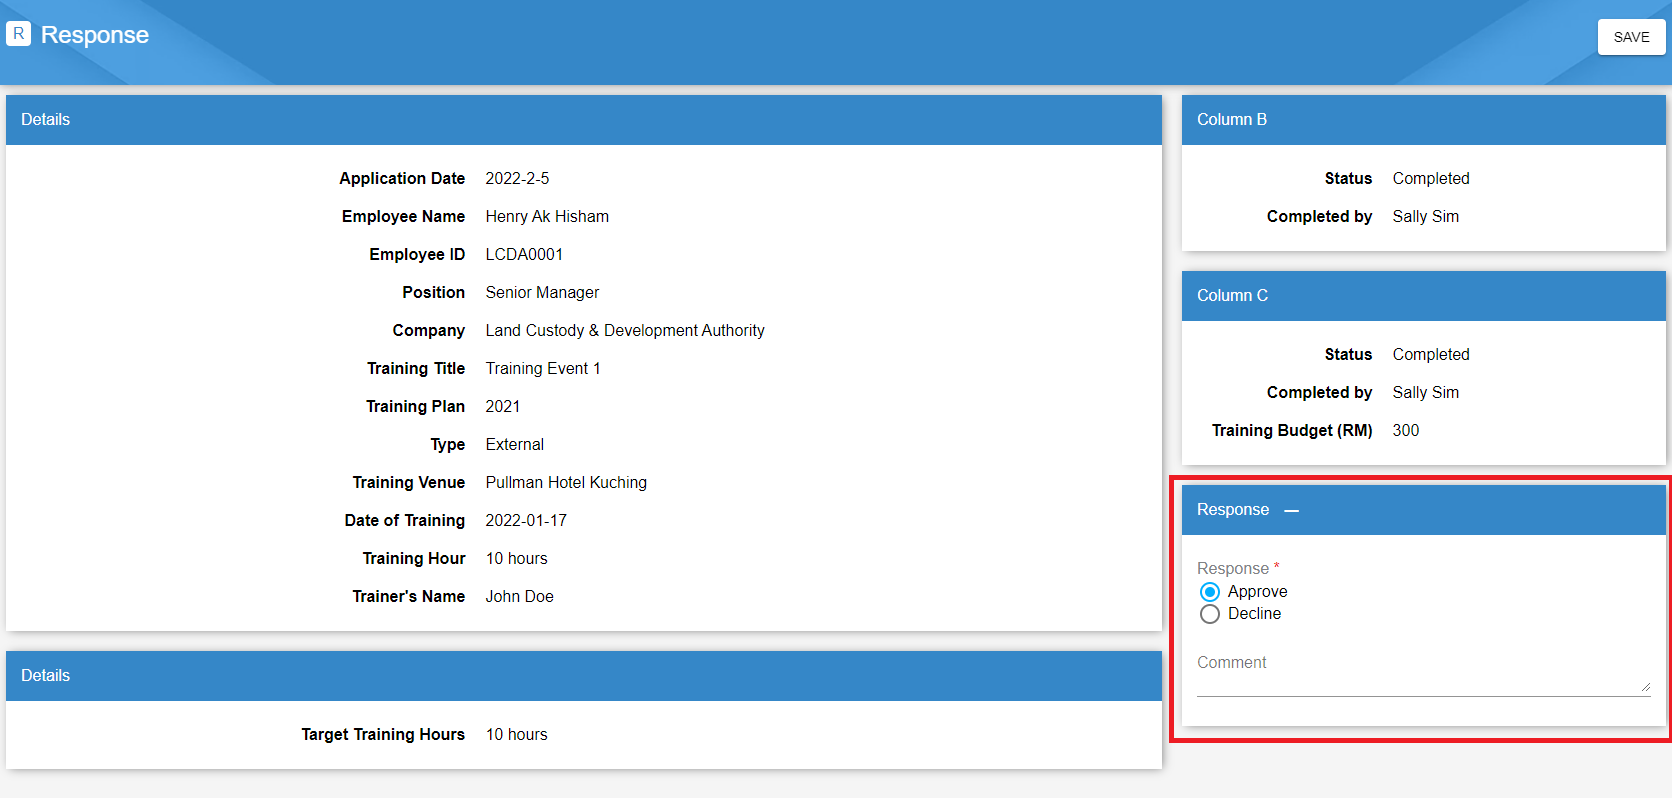
Now, you have completed the steps! The application has been approved. Of cause, you can also decline the application. If you have declined the application, you can still change the status by click on the 
View Application Admin
To view the training application information, click on the
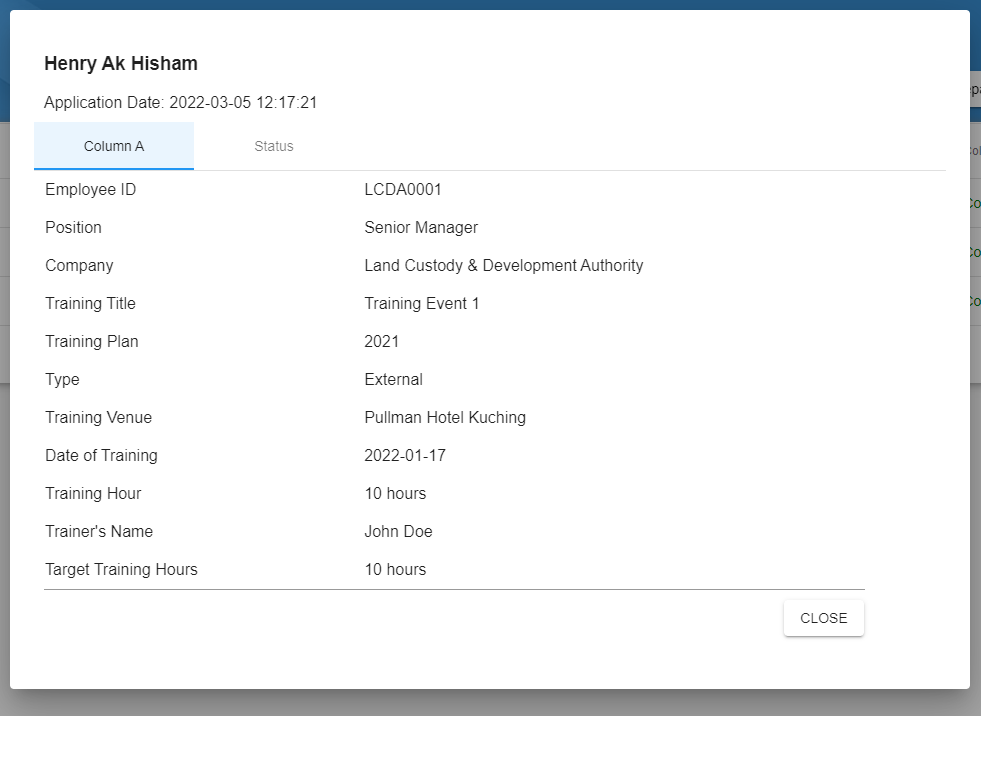
Delete Application Admin
To delete an application, click on the
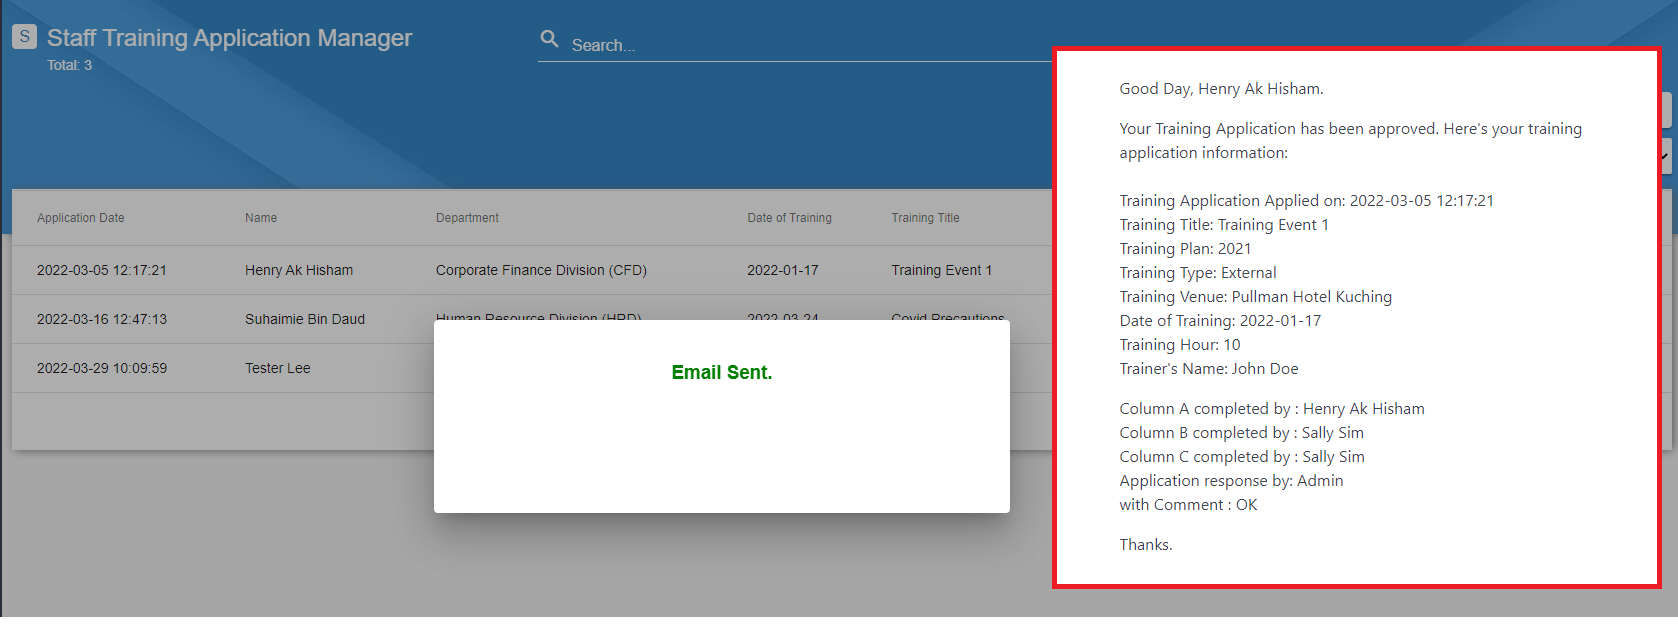
Notify Applicant Admin
To notify the applicant about the application response, click on the

An email will be sent to the applicant's mailbox.
Training Report Admin
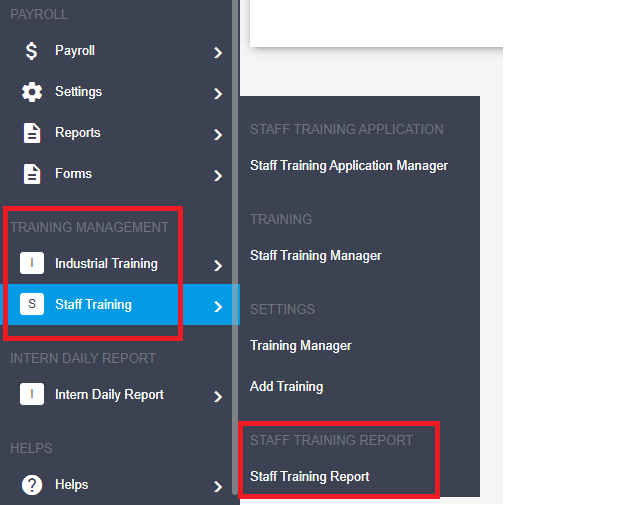
A report is used to help the user have an overview of the training events. You can view the report by clicking the Staff Training Report from (Training Management) Staff Training > (Staff Training Report) Staff Training Report.
Overview Report
To generate an overview report of the training events, click on the Export Report.

Choose your option on the format to generate (PDF or CSV) and click Export.
If you wish to view the information without generating a report, click on the Overall button on the top right corner.

The overall will calculate the Total Cost in RM and the Total Training Hours.
You can filter the data by using the filter function or search bar.

Attendees Report
Want to know who has attended the particular training event? Click the

In this page, you can view the details of attendees for a particular training event. The overall will calculate the Total Cost in RM and the Total Training Hours.
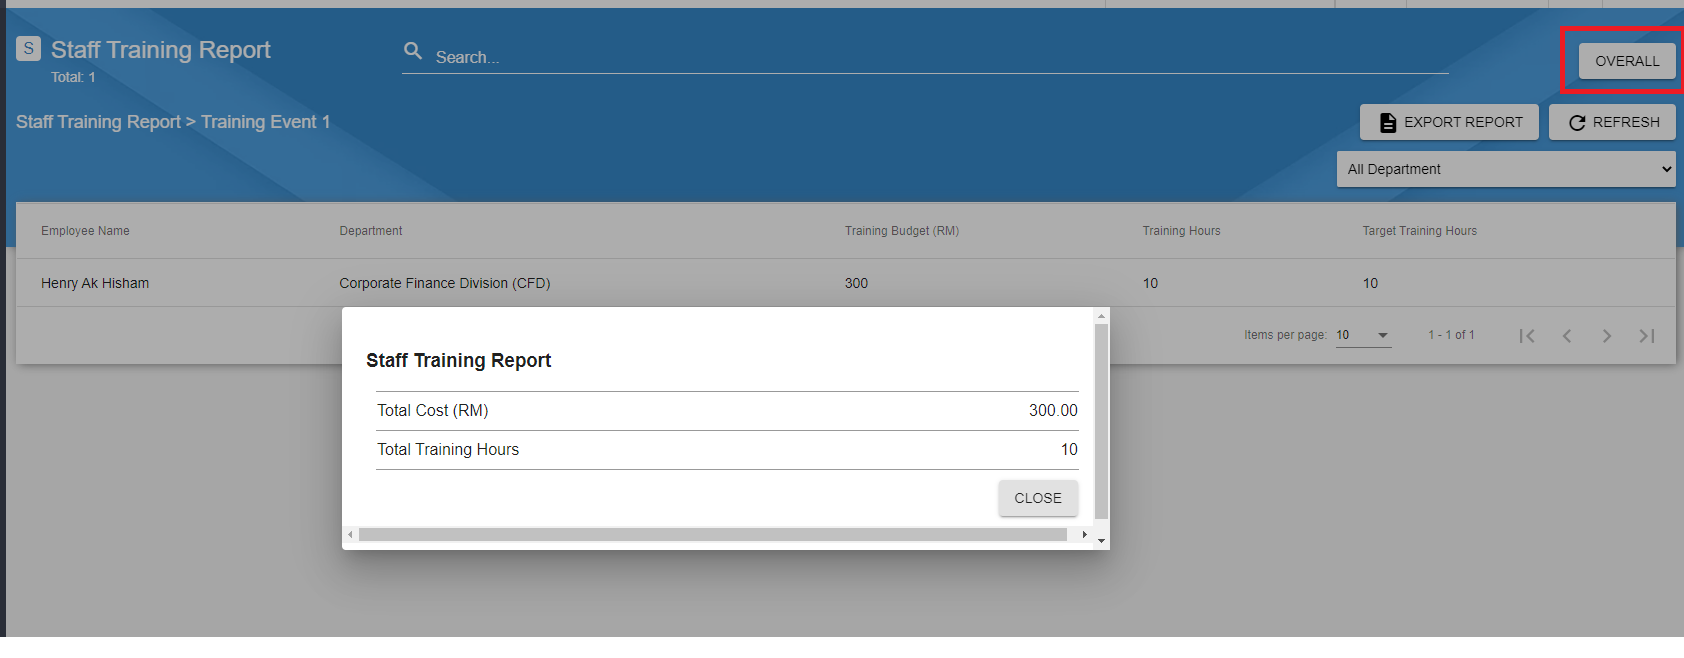
{primary} The
Overall button for the Attendees Reportis different from theTraining Report. TheOverall button for the Attendees Reportis for a particular event, and theOverall button for the Training Reportis for all training events.
To generate an attendees report, click on the Export Report.

Choose your option on the format to generate (PDF or CSV) and click Export.
You can filter the data by using the filter function or search bar.

Add A Payment Record Finance
Step 1
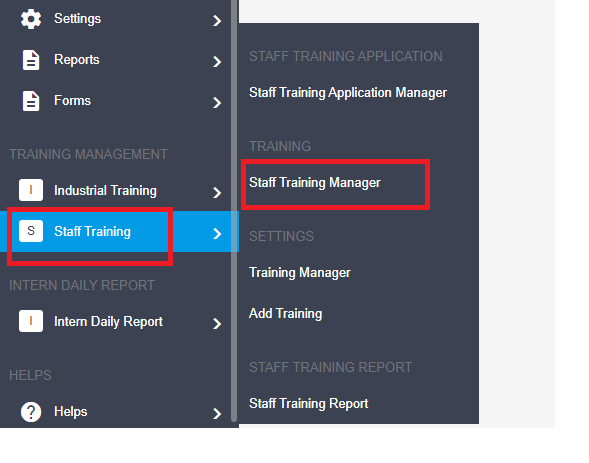
Click on the Staff Training Manager.
Step 2
All the approved training applications will be displayed here. To add a payment record, click on the

Step 3
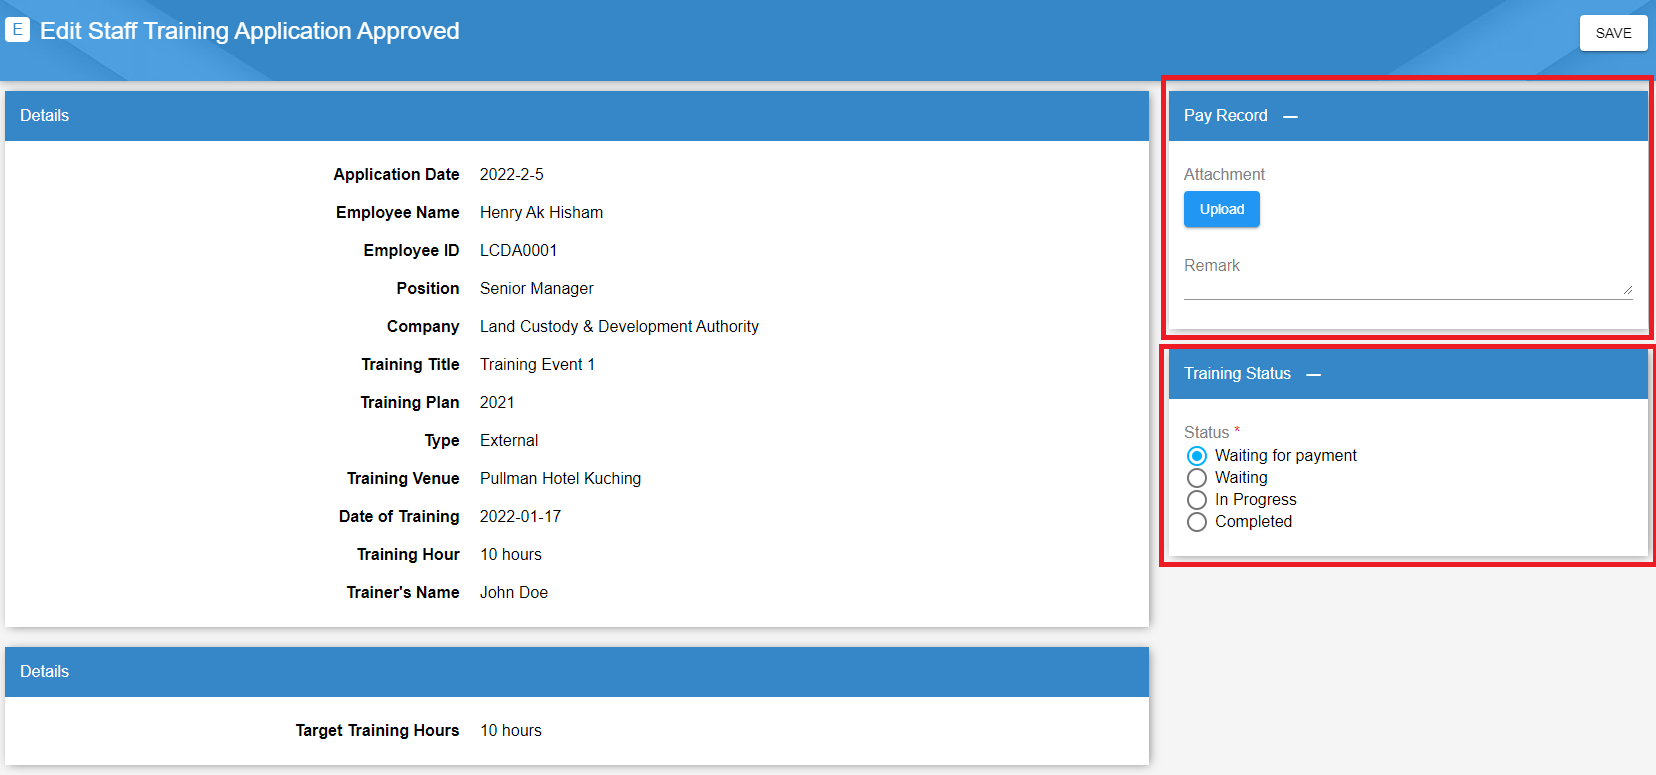
On the left side displayed the training and application information, you can give the response on the right side.
| Card title | Function |
|---|---|
| Pay Record | Attach a receipt as proof that the payment has been made. Use the remark if needed. You can still add in the record after updating the training status. |
| Training Status | Update the training status. |
You have done all steps!
Remind On Evaluation Form and Certificate Finance
Once the training has done (completed), you can send an email to the applicant to remind them about the submission of the certificate and evaluation form.

Click on the
Search Application Finance
To filter the application, use the search bar or filter function.
