Approver
This feature is for adding and managing approvers for both Leave and Payroll. This section will be split into several subsections for Approval List, Approver Level and Approver in order of how it works. All 3 of these subsections are closely linked to one another.
You may think of the Approval List as the setting for the approvers, the Approver Level as the level for the approvers and the approver as the employee assigned to be an approver. Usually only the Admin or assigned employees can access this feature.
Accessing Approval List
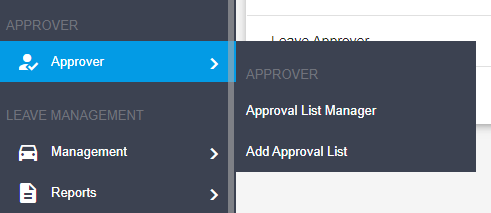
To access this feature, go to the sidebar menu, hover over the Approver, then click Approval List Manager as illustrated in the image below.
Approval List
An approval list is a setting for which determines what approvers in this list can approve on and which Leave Type they are able to approve on.
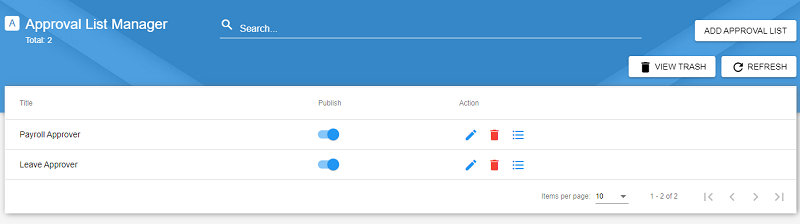
Approval List Manager
The Approval List Manager displays all the approval lists in the system. Below is the picture of the Approval List Manager.
The following table will list down in details, the functions of the icon buttons that you can see in the table.
| Icon Button | Function |
|---|---|
Links to the edit page to edit the Approval List. |
|
Opens up a confirmation popup. Click the Delete button to confirm your deletion of the Approval List. |
|
Links to the Approval Level Manager page for this Approval List. |
The search function is available by clicking on the Searchbar and typing in the Title.
Adding an Approval List
To add in an Approval List, click on the Add Approval List button on the top right of the Approval List Manager or click on the Add Approval List in the sidebar menu.
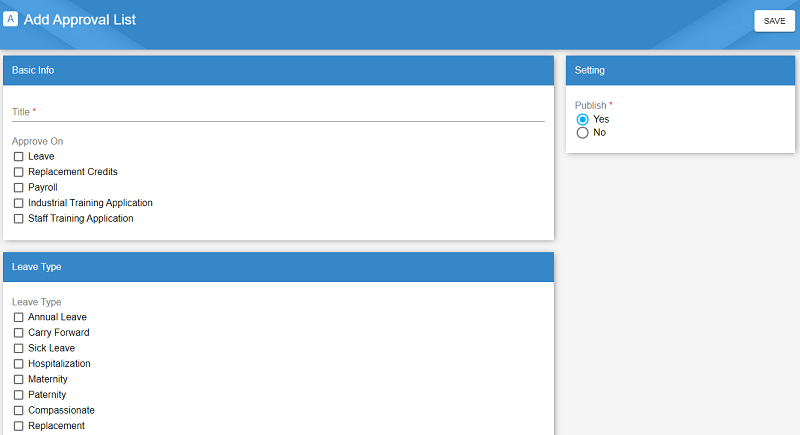
Fill in the title of the Approval List, select one or more Approve On. Next, if Leave is selected in Approve On, select which Leave Type they are able to approve. For example, for an Approval List titled Leave Approver, they can approve on Leave and Replacement Credit and they can specificly approve Annual Leave and Sick Leave. Click Save once done.
Approver Level
An Approver Level is the level of the approver. There are 2 levels in the system to approve either Leave, Replacement Credit or Payroll. Level 1 is a lower rank than Level 2. Each level can have multiple staff categories.
{info} If an approver of Level 1
Declinedany application or payroll, the application or payroll is automatically declined.
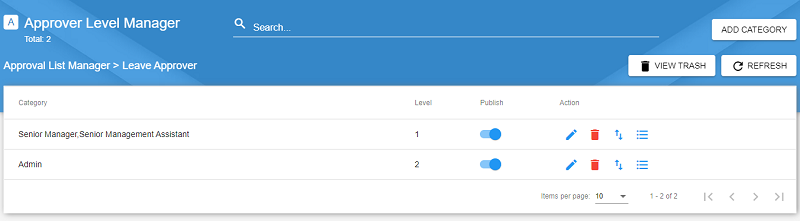
Approver Level Manager
The Approver Level Manager displays all the Approver Levels in the system. Below is the picture of the Approver Level Manager.
The following table will list down in details, the functions of the icon buttons that you can see in the table.
| Icon Button | Function |
|---|---|
Links to the edit page to edit the Approver Level. |
|
Opens up a confirmation popup. Click the Delete button to confirm your deletion of the Approver Level. |
|
Links to the Approver Manager page for this Approver Level. |
The search function is available by clicking on the Searchbar and typing in the Category.
Adding an Approver Level
To add in an Approver Level, click on the Add Category button on the top right of the Approver Level Manager.
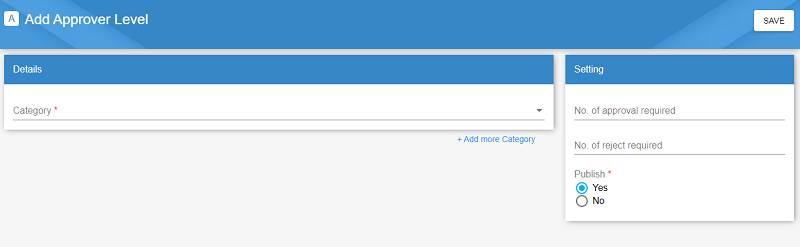
Select the staff category from the list. To add in more than one category, click on the + Add more Category. Add in the number of approvals or number of rejects if need too, else they can be left blank. Click Save once done.
Approver
An approver is an employee assigned to approve or decline whatever is set in the Approval List. There can be many approvers in one Approver Level.
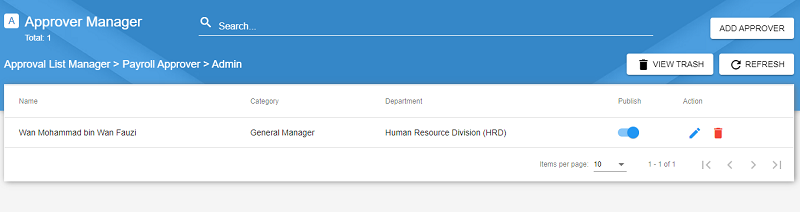
Approver Manager
The Approver Manager displays all the Approvers within an Approval Lists in the system. Below is the picture of the Approver Manager.
The following table will list down in details, the functions of the icon buttons that you can see in the table.
| Icon Button | Function |
|---|---|
Links to the edit page to edit the Approver. |
|
Opens up a confirmation popup. Click the Delete button to confirm your deletion of the Approver. |
The search function is available by clicking on the Searchbar and typing in the Name.
Adding an Approver
To add in an approver, click on the Add Approver button on the top right of the manager.
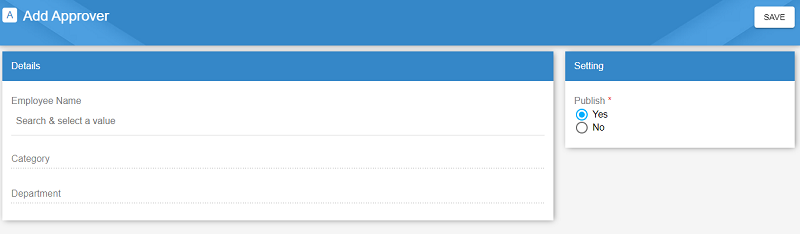
Search or select the Employee Name, the Category and Department will be automatically filled in upon select. Then click Save.